
You’re going to love these dirt cake cups! They’re not only delicious but also a blast to make. Perfect for parties, potlucks, or just a fun family dessert night.
Why This Recipe Works
- It’s a no-bake dessert, making it perfect for hot summer days when you don’t want to turn on the oven.
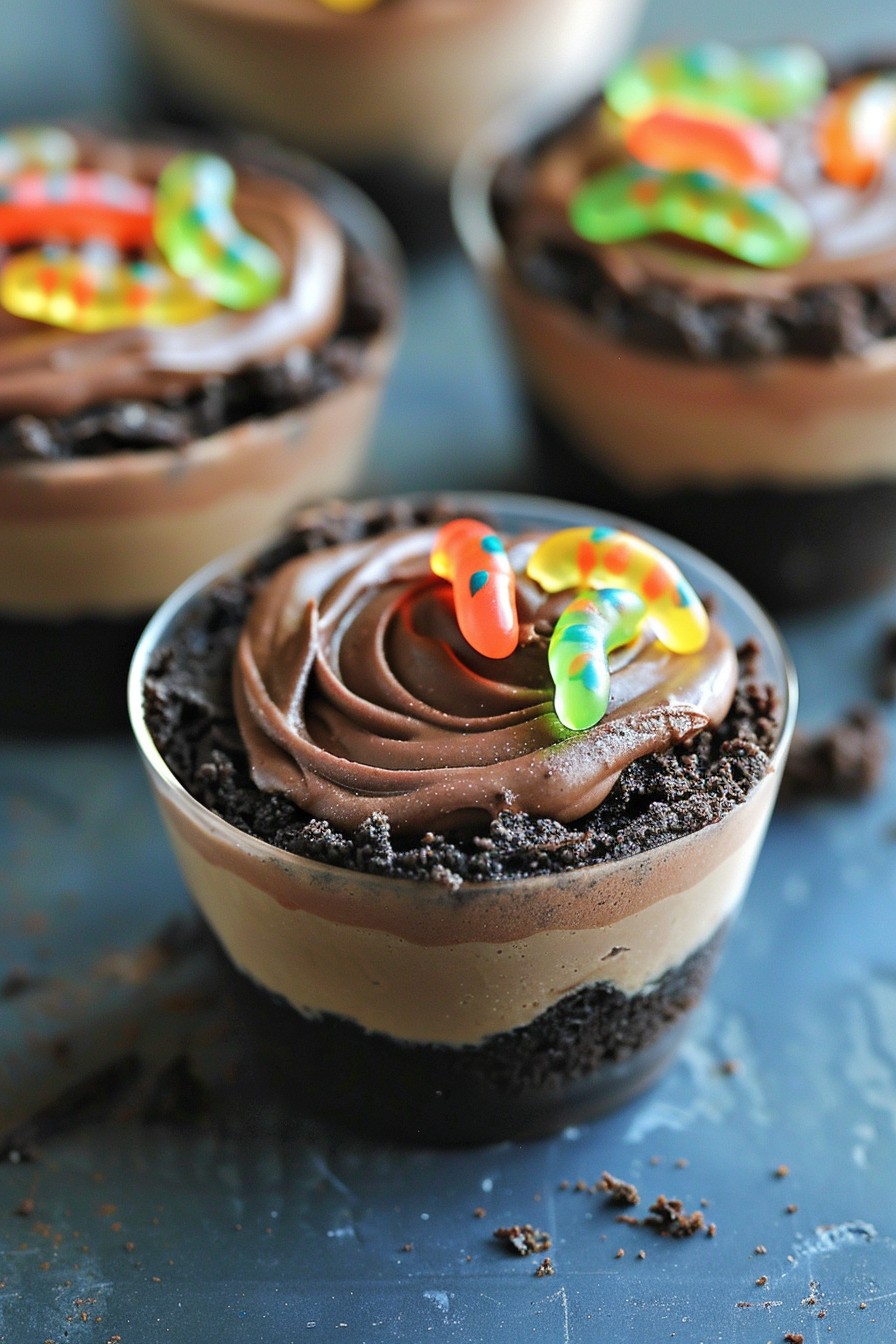
- The combination of creamy pudding and crunchy cookies mimics the look and texture of real dirt, but tastes infinitely better.
- Customizable with your favorite mix-ins, like gummy worms or chocolate chips, to make it your own.
- Quick to assemble, so you can spend less time in the kitchen and more time enjoying your creation.
- Great for teaching kids about cooking, as it’s simple and fun to put together.
Ingredients
- 1 package (3.9 oz) instant chocolate pudding mix
- 2 cups cold milk
- 1 cup whipped topping, thawed
- 1 package (14.3 oz) chocolate sandwich cookies, crushed
- Gummy worms, for decoration
Equipment Needed
- Mixing bowls
- Whisk
- Measuring cups
- Clear plastic cups (for serving)
- Spoon or spatula
Instructions

Step 1: Prepare the Pudding
In a large mixing bowl, whisk together the instant chocolate pudding mix and cold milk until smooth. Let it sit for about 5 minutes to thicken. Tip: For an extra creamy texture, fold in the whipped topping gently until fully incorporated.
Step 2: Crush the Cookies
Place the chocolate sandwich cookies in a zip-top bag and crush them into fine crumbs using a rolling pin. You’re aiming for a dirt-like consistency. Tip: For a chunkier texture, leave some larger pieces for added crunch.
Step 3: Layer the Dirt Cake
Start by adding a layer of cookie crumbs to the bottom of each clear plastic cup. Follow with a layer of the pudding mixture, then repeat the layers until the cups are nearly full, ending with cookie crumbs on top.
Step 4: Decorate Your Dirt Cake Cups
Stick a few gummy worms into the top layer of cookie crumbs so they peek out, mimicking worms in dirt. Feel free to get creative with other decorations like flower-shaped candies or chocolate rocks.
Step 5: Chill Before Serving
Refrigerate the dirt cake cups for at least an hour before serving to allow the flavors to meld and the pudding to set completely. Tip: For best results, serve chilled.
Tips and Tricks
For an adult version, consider adding a splash of coffee liqueur to the pudding mixture for a mocha twist. If you’re short on time, pre-crushed cookie crumbs can be a time-saver, though crushing them yourself allows for texture control. To make these even more festive, use themed decorations to match the occasion, like candy bones for Halloween or pastel candies for Easter.
Recipe Variations
- Use vanilla pudding and golden Oreos for a ‘sand’ version of dirt cake.
- Incorporate cream cheese into the pudding mixture for a richer, tangier flavor.
- Add layers of fruit, like strawberries or bananas, for a fresh twist.
- Swap out gummy worms for other candies, such as sour patch kids or jelly beans, depending on your preference.
- Make a large trifle instead of individual cups for a show-stopping party dessert.
Frequently Asked Questions
Can I make dirt cake cups ahead of time?
Absolutely! These desserts can be assembled a day in advance and stored in the refrigerator until you’re ready to serve. Just add the gummy worms and any other decorations right before serving to keep them from getting soggy.
Can I use homemade pudding instead of instant?
Yes, homemade pudding can be used for a richer flavor. Just ensure it’s cooled completely before layering to prevent the cookie crumbs from becoming too soggy.
Are there any nut-free options for this recipe?
This recipe is naturally nut-free, but always check the labels on your ingredients, especially the cookies and pudding mix, to ensure they’re made in a nut-free facility if allergies are a concern.
Summary
Dirt cake cups are a delightful, no-bake dessert that’s as fun to make as it is to eat. Perfect for any occasion, they’re sure to be a hit with both kids and adults. With endless customization options, you can make this recipe your own.
