
Forget turning on the oven for this decadent dessert. This no-bake Oreo cheesecake is your ticket to creamy, crunchy bliss without breaking a sweat. Perfect for those hot summer days or when you’re just too lazy to bake.
Why This Recipe Works
- No baking required means no heat, no fuss, and no waiting for the oven to preheat.
- The Oreo crust adds a delightful crunch that contrasts perfectly with the creamy cheesecake filling.
- It’s incredibly versatile; customize it with your favorite Oreo flavors or toppings.
- Perfect for make-ahead desserts, as it needs time to set in the fridge.
- Even beginners can nail this recipe with minimal effort and maximum flavor.
Ingredients
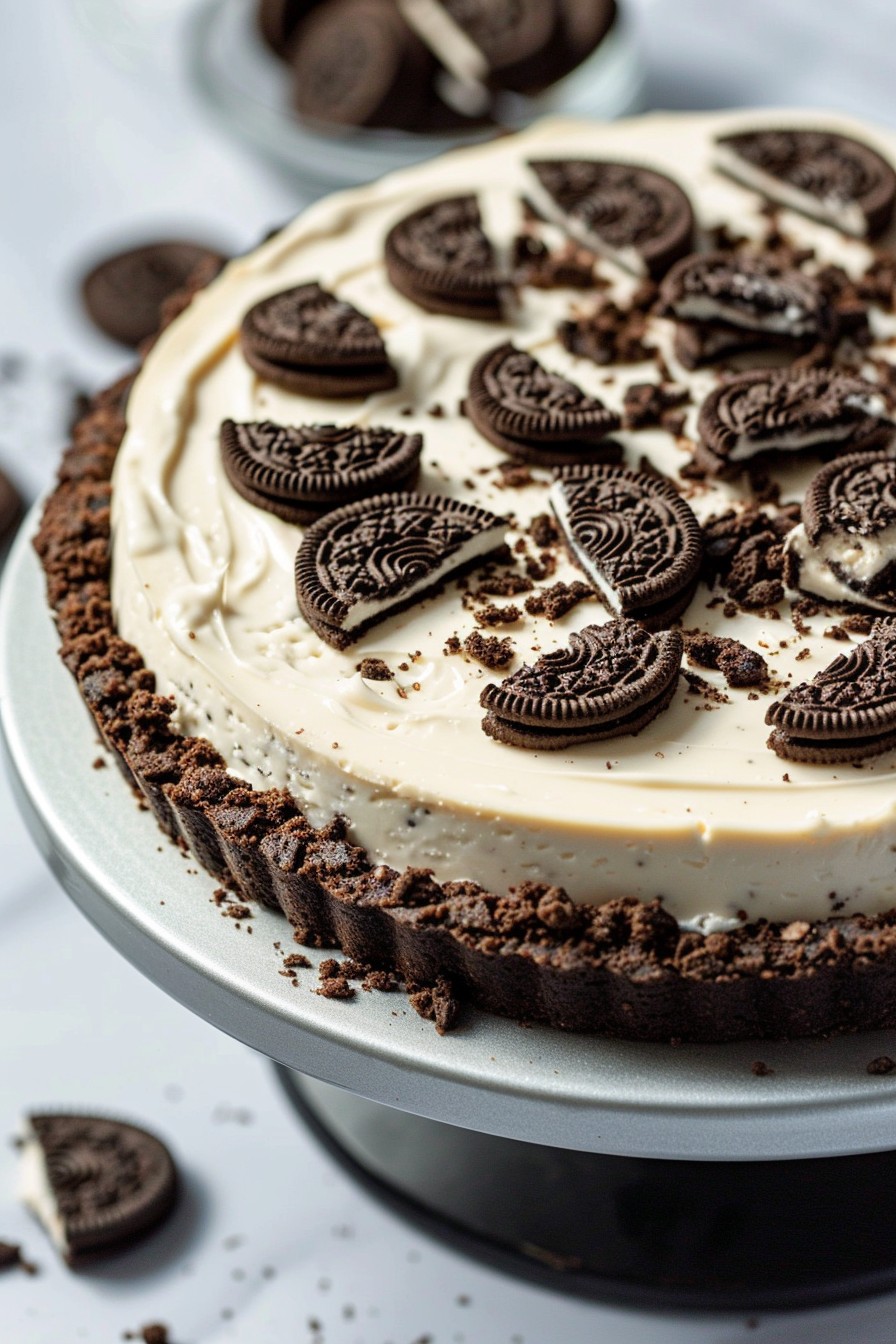
- 24 Oreo cookies (2 cups when crushed)
- 4 tbsp unsalted butter, melted
- 16 oz cream cheese, softened
- 1/2 cup granulated sugar
- 2 tsp vanilla extract
- 1 cup heavy whipping cream
- 12 Oreo cookies, chopped (for topping)
Equipment Needed
- 9-inch springform pan
- Food processor or zip-top bag and rolling pin
- Electric mixer
- Mixing bowls
- Spatula
Instructions

Step 1: Crush the Oreos
Place 24 Oreo cookies in a food processor and pulse until fine crumbs form. No food processor? No problem! Place the cookies in a zip-top bag and crush them with a rolling pin. Mix the crumbs with melted butter until well combined. Press the mixture firmly into the bottom of a 9-inch springform pan. Chill in the fridge while you prepare the filling.
Step 2: Whip the Cream
In a large bowl, beat the heavy whipping cream until stiff peaks form. This should take about 3-4 minutes on high speed with an electric mixer. Set aside. This step is crucial for that light, airy texture we’re after.
Step 3: Mix the Cheesecake Filling
In another bowl, beat the softened cream cheese, sugar, and vanilla extract until smooth and creamy. Gently fold in the whipped cream until no streaks remain. Be careful not to overmix, or you’ll deflate the whipped cream.
Step 4: Assemble the Cheesecake
Pour the cheesecake filling over the chilled Oreo crust. Smooth the top with a spatula. Sprinkle the chopped Oreo cookies on top for an extra crunch. Cover with plastic wrap and refrigerate for at least 6 hours, or overnight, to set.
Step 5: Serve and Enjoy
Once set, remove the cheesecake from the springform pan. Slice with a sharp knife, wiping the blade between cuts for clean slices. Serve chilled and watch as it disappears before your eyes.
Tips and Tricks
For a smoother crust, ensure the Oreo crumbs are finely ground. If you’re short on time, you can freeze the cheesecake for 2-3 hours instead of refrigerating, though the texture might be slightly firmer. To prevent the cheesecake from sticking to the pan, you can line the sides with parchment paper. For a more intense Oreo flavor, add a teaspoon of Oreo crumbs into the cheesecake filling. Always use full-fat cream cheese for the best texture and flavor.
Recipe Variations
- Try using different Oreo flavors like mint or peanut butter for a unique twist.
- Add a layer of chocolate ganache or caramel sauce on top of the crust before adding the cheesecake filling.
- Incorporate mini chocolate chips or crushed candy bars into the filling for extra texture.
- For a lighter version, substitute the heavy whipping cream with whipped coconut cream.
- Top with fresh berries or a berry compote for a fruity contrast.
Frequently Asked Questions
Can I make this cheesecake ahead of time?
Absolutely! This cheesecake needs to set in the fridge for at least 6 hours, making it the perfect make-ahead dessert. It can be stored in the refrigerator for up to 3 days or frozen for up to a month. Just thaw overnight in the fridge before serving.
Can I use a different type of cookie for the crust?
Yes, you can substitute Oreos with any similar sandwich cookie. Graham crackers or chocolate wafers also make a great crust. Just remember to adjust the amount of butter accordingly to achieve the right consistency.
Why did my cheesecake filling turn out lumpy?
Lumpy filling usually results from not softening the cream cheese enough before mixing. Ensure your cream cheese is at room temperature to avoid this issue. If lumps persist, you can strain the filling through a sieve before adding the whipped cream.
Summary
This no-bake Oreo cheesecake is a foolproof, delicious dessert that requires minimal effort but delivers maximum flavor. Perfect for any occasion, it’s sure to impress with its creamy texture and crunchy Oreo crust.
